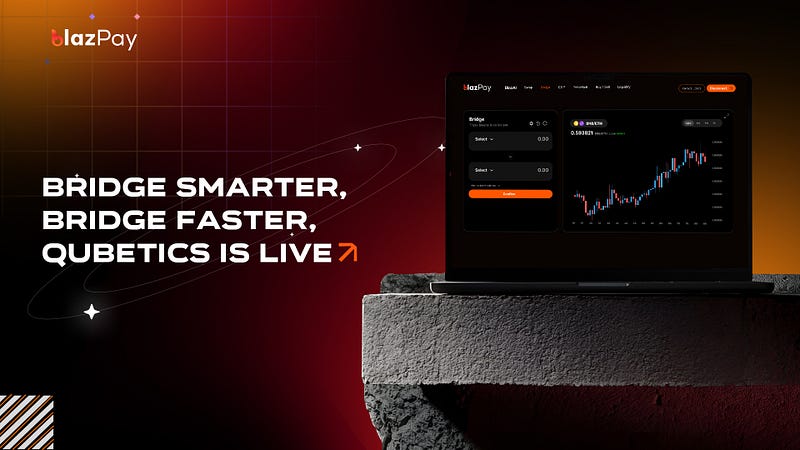
Seamless Cross-Chain Transfers: Your Guide to Using the Qubetics Bridge on Blazpay

At Blazpay, we’re committed to making DeFi simpler, faster, and more accessible. That’s why we’re thrilled to announce the integration of… Seamless Cross-Chain Transfers: Your Guide to Using the Qubetics Bridge on Blazpay At Blazpay, we’re committed to making DeFi simpler, faster, and more...
Seamless Cross-Chain Transfers: Your Guide to Using the Qubetics Bridge on Blazpay
At Blazpay, we’re committed to making DeFi simpler, faster, and more accessible. That’s why we’re thrilled to announce the integration of Qubetics Bridge — your gateway to secure, lightning-fast cross-chain transfers.
Why Qubetics Bridge?
The Qubetics Bridge brings together speed, security, and flexibility:
- Fast Transfers: Move your assets between chains in seconds.
- Secure Bridge: Protected by multi-signature verification and strong security protocols.
- Multi-Network Support: Easily bridge between Arbitrum, BSC, Base, and Qubetics networks.
Bridge now: https://qube.blazpay.com
Step-by-Step Guide:
Move assets across chains in minutes using the Qubetics Bridge- now live on Blazpay. This guide walks you through every click, from connect to claim.
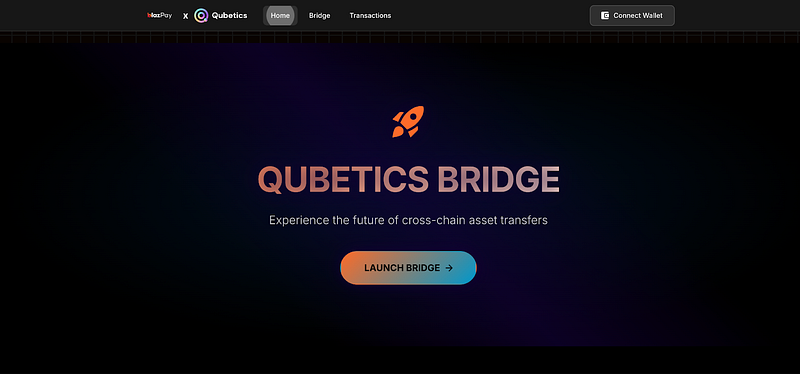
Step 1 — Access the Qubetics Bridge
Go to Qubetics Bridge on Blazpay.
You’ll land on the Bridge Home Page, where you’ll see the “Launch Bridge” button.
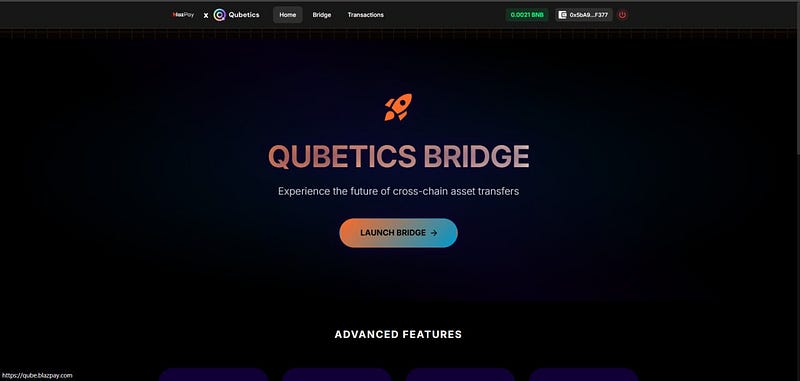
Step 2 — Connect Your Wallet
Click “Connect Wallet” in the top right corner.
Select your preferred wallet — MetaMask is the most common choice, but you can use any compatible wallet.
Once connected, your wallet address will appear at the top.
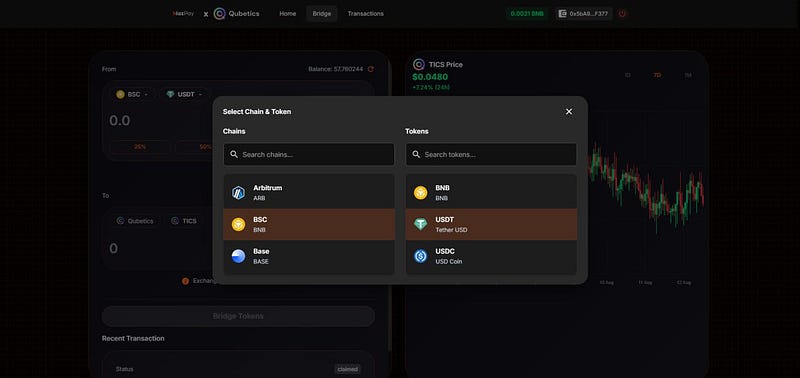
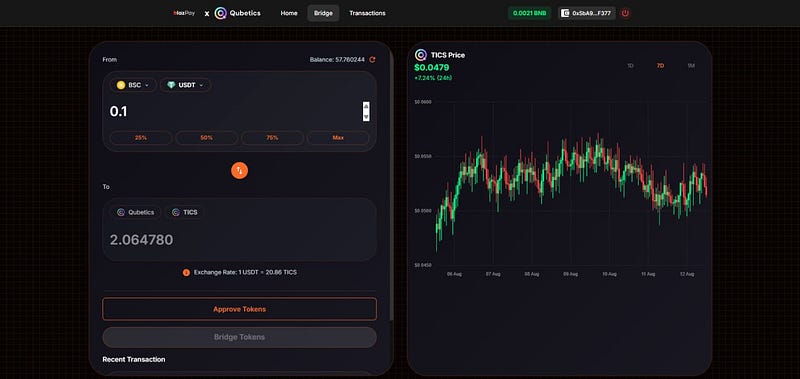
Step 3 — Pick your source chain & token
In the From panel, choose the chain you’re sending from (e.g., BSC) and the token (e.g., USDT).
You can also use the 25% / 50% / 75% / Max shortcuts later.
This tells the bridge where your funds are coming from and which asset you want to send.
Step 4 — Enter the amount & review the rate
Type how much you want to bridge (e.g., 0.1 USDT).
Check the Exchange Rate line (e.g., 1 USDT = 20.86 TICS). Rates are dynamic.
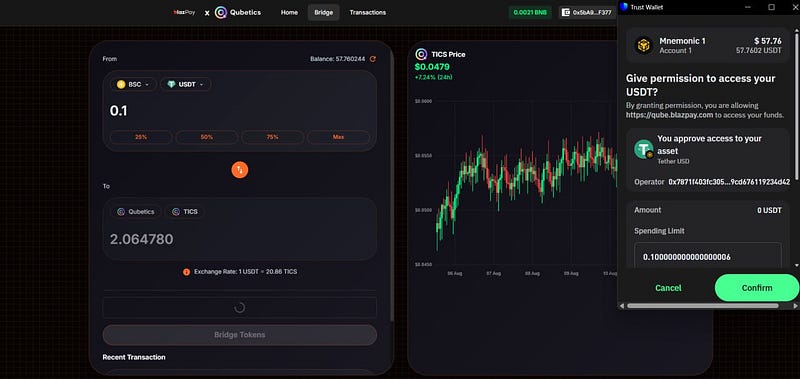
Step 5 — Approve the token (first time only)
Click Approve Tokens. Your wallet will ask for permission to let the bridge spend your USDT.
- Review the spending limit and network fee, then Confirm.
Step 6- Bridge the tokens
After approval, click Bridge Tokens and confirm the transaction in your wallet.
You’ll see a success notification (e.g., “Successfully sent 0.1 USDT to Qubetics”).

Step 7 — Verify in Transaction History
Open the Transactions tab to see full details:
- Direction: From BSC to Qubetics
- Deposit Amount: (e.g., 0.1 USDT)
- Claim Amount: (e.g., 2.06… TICS)
- Exchange Rate, Tx Hash, Block, Status (Deposit: SUCCESS, Claim: SUCCESS)

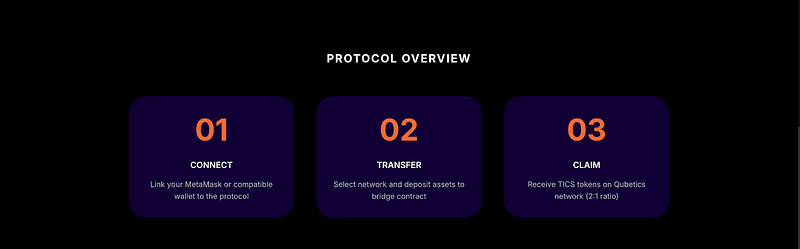
Protocol overview
Connect → Transfer → Claim — that’s the whole flow.
Start Bridging Today
Open qube.blazpay.com, connect, and move your assets wherever you need them-quickly and securely.
About the Author
Ryan Becker is a cryptocurrency researcher and analyst who writes about blockchain technology, DeFi ecosystems, and digital asset markets. With a strong focus on real-world utility and emerging Web3 trends, Ryan simplifies complex topics for everyday users while offering deep insights for advanced readers. His work aims to make crypto more accessible, transparent, and understandable for everyone.
View all articles by Ryan Becker →